Introduction
Within This Page
Today's leading-edge research facilities speak of the importance and excitement of the research work. The design of a research center can significantly impact productivity, as well as the recruitment, morale and retention of researchers and staff. The laboratories are where researchers concentrate their time, and the environment speaks volumes about the perceived value of the work and the people who do it.
Beyond being highly functional in service of the research, the most successful facilities are welcoming, inspiring, educational, easy to navigate, flexible, efficient, technology-friendly, comfortable, quiet and durable. They also promote collaboration and excellence in small and large ways.
The look and feel of the building sets the tone. The design aesthetic should flow continuously from the exterior of the building to the interior, including the reception area and lobby, lounges and break rooms, laboratories, corridors, elevators and stairs, lab offices and office support spaces. Office support spaces typically include copy, file and storage rooms. Break rooms may be in the office area or between the offices and labs.
Reception and Lobby
The reception/lobby area of a research facility presents a powerful first impression about an organization's culture. Beyond simply serving as an entrance and exit, it should welcome employees, visitors and service staff. In its finest form, the lobby is the heart of the building if the surrounding paths, rooms and activities around the atrium are very busy - a natural gathering place for meeting and spontaneous conversations.
A central atrium, which makes the building open and friendly, is one successful design option. A showpiece for the facility, an atrium serves as an inviting entry, a main circulation hub and an ideal space for small or large gatherings and special events. Conference rooms, offices, research labs and corridors on various levels are typically adjacent to and in view of the atrium, allowing people to be seen from multiple floors. Such visibility between those in the atrium and surrounding spaces encourages chance meetings and an exchange of ideas.
The main entrance of a laboratory building warrants high priority, both in appearance and durability. The materials in the lobby should reflect the transition from the exterior of the building to the smaller-scale interior spaces. Floor and ceiling patterns should be proportional to the scale of the space: large, open spaces such as atriums lend themselves to large-scale design features; smaller-scale spaces are better suited to more restrained design elements. Because public spaces of a building endure considerable traffic, materials should be durable. Also consider the maintenance required to keep the space looking fresh, as some operations will have a limited staff and budget to dedicate to arduous upkeep or periodic repairs.
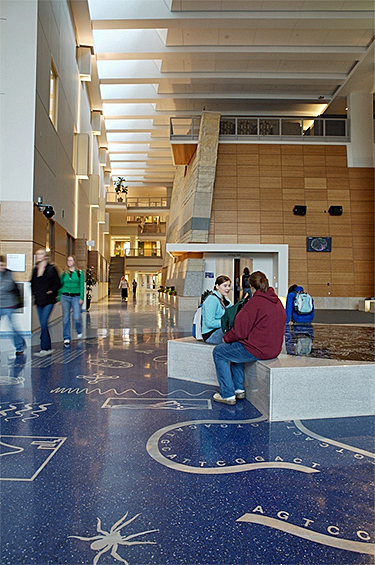
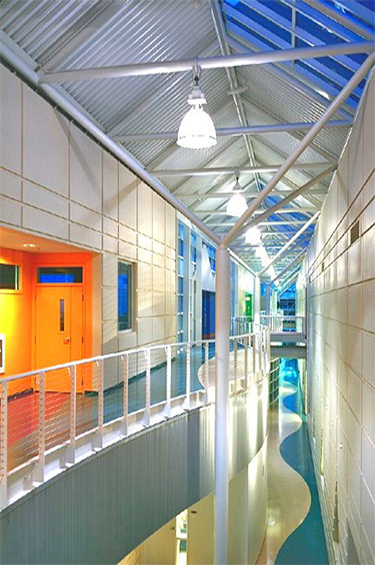
At Winona (Minn.) State University, the two-story atrium in the Science Laboratory Center incorporates a stairway as well as a bridge for movement from one side of the building to the other. Multiple materials and colors add visual interest, and the artwork doubles as a teaching and communication tool.
Main Street at Genencor is vibrant with various colors, forms and materials.
Incorporating functional elements, such as a stairwell, into an atrium or reception area provides opportunities for interaction among people who might not otherwise cross paths regularly. Ideally, such a prominent stairway would be a highly detailed and well-finished architectural feature that enhances the entire lobby.
A large atrium might feature lounge seating at balcony areas, providing alternative work areas for individuals or small groups. These areas may be informal, with comfortable seating, tack boards, display areas and power/voice/data ports to accommodate laptops and other devices.
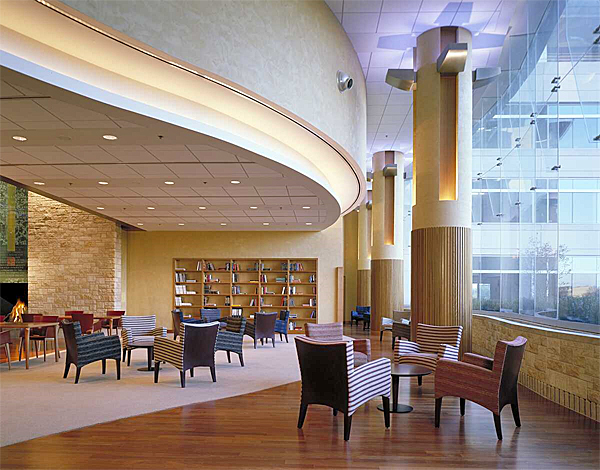
The Stowers Research Center provides a comfortable space to meet with guest and presents a first-class image of the campus.
Lighting in public spaces deserves special attention. In a spacious atrium, large-scale decorative fixtures define the scale of the space and make an important design statement. When planning lighting, remember that maintenance staff must easily access light fixtures. Also, consider the views from adjacent areas of the building, and even other buildings. Not doing so often results in bare lamps being visible from locations above the atrium. Beyond its impact on interior space, light serves as a nighttime lantern for the building exterior.
Conference Rooms
Conference rooms provide critical support space for a building. Whether formal (enclosed) or informal, conferencing areas provide building occupants with valuable communication and collaboration tools. These rooms should incorporate appropriate technology, sound controls to maintain privacy, multiple levels of lighting, flexible furniture for multiple configurations, and views to the building exterior to accommodate long meetings.
Formal and informal conferencing areas have equally important but unique functions. Enclosed conference rooms help focus attention, while informal meeting areas sprinkled throughout the building hint that the opportunity to collaborate is never far away.
Sound control for enclosed conference areas allow presenters and other participants to interact without fear of disrupting those in adjacent spaces. Various construction methods aid in sound control, the most straightforward being to extend walls to the underside of the slab and include sound batts. Increasing the size of studs and the number of gypsum wallboard layers also factors significantly in sound control, as do sound-absorbent soft materials such as floor carpeting, lay-in acoustical ceiling tiles and wall-mounted acoustic panels.
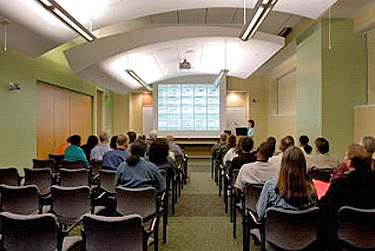
A successfully designed conference room also features varied light levels and task-specific lighting.
The technology provided in a conference room is critical. In times past, a ceiling-mounted projector and projection screen would have sufficed. Today, however, designers must consider a myriad of equipment, including LED projectors, projection screens, LED/plasma screens, teleconferencing systems, networked computers, whiteboards, tack boards, sound-masking, ceiling-mounted speakers, power/data connections to furniture, conference-call modules and preset lighting configurations. For complex conference rooms, carefully consider how all of these elements may work together.
A room may have general ambient lighting, wall-washers at the perimeter to light whiteboards and tack boards, dimming downlights for low-light presentations and specialty lighting for video conferencing. For multimedia presentations, lighting can be controlled by a single panel with function-specific settings, providing a user-friendly interface for a wide variety of presentation styles and needs.
Conference room furniture should accommodate the anticipated presentations. Attendees may be in an auditorium-like setting, a classroom setting, a conference table setting, in small teams or any number of scenarios. Folding tables and stacking chairs are convenient as they may be easily removed or reconfigured. In that case, provide ample storage space nearby.
Natural daylight provides welcome visual relief during long meetings. In spaces with exterior day lighting, light control must be designed into the space. With dual roller shades, one shade reduces direct daylight and glare, while a second shade, for presentations, blacks out all daylight. When blackout shades are used, the system must include side channels to prevent light from leaking in.
In larger conference rooms, consider food service, as long meetings typically include refreshments. The integration of a pass-through window with access on each side or a separate breakout area allows minimal disruption, which is ideal.
Lounges and Break Rooms
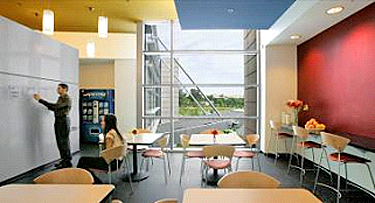
Lounges and break rooms are important common amenities. Planners must decide early on whether to have a lounge/break room on each floor or a single central amenity for the entire building. Consider the culture of the researchers and the design of the facility as a whole. Lounges/break rooms provide relief from work and are intended to act as anchors within individual floors. When positioned at key locations that allow for cross-traffic from multiple departments, they foster interaction.
Provisions should be made for local copying, printing, office supplies and mailboxes, along with amenities such as coffeemakers, microwaves and floor-standing water filters or dispensers. Food or beverage vending machines are provided in most facilities. Like break rooms, vending machines may be centralized or decentralized. Because machines add considerable heat to a smaller enclosed space, they should be properly ventilated.
Break-area design should include a convenient yet unobtrusive area for trash and recycling bins. Ideally the bins should be concealed, yet logically placed so their location and use is clear.
Corridors
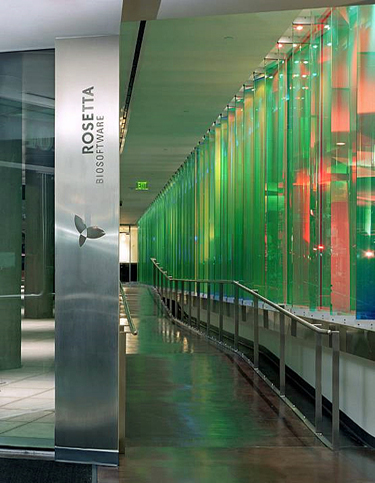
Merck Rosetta handicap ramp is colorfully designed with added educational information to make the walk enjoyable and memorable.
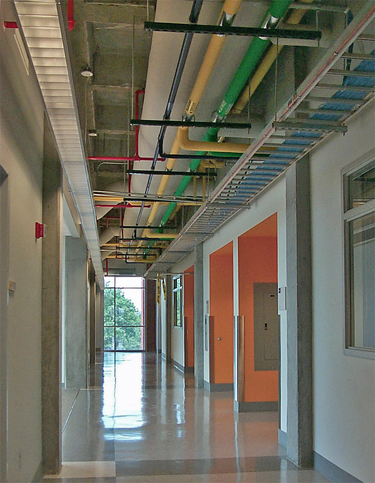
The engineering services are painted and exposed to provide the image desired by the client and to provide easy access for maintenance.
Corridors serve multiple functions, and thus command attention on many levels during planning. They define a facility's layout; serve as hallways with opportunities for displays and interaction; and house ducts, piping and wires for the mechanical, electrical and plumbing systems in ceilings. In the following paragraphs, we examine important elements of corridor ceiling systems, hallways, doors, windows, flooring, finishes, seating and displays, as well as office and service corridors.
Corridor Ceiling Systems
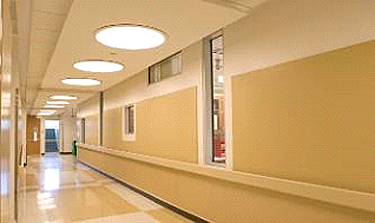
The research corridor is uniquely designed to feel welcoming. Interior glass provides views into the labs, and the ceilings, windows and floor patterns are thoughtfully coordinated.
Ceiling plane options have expanded beyond a lay-in or exposed ceiling. Choices now also include metal or wood panels (both available with perforated faces for acoustics) and any option combined with gypsum wallboard. Access should be easy so that routine maintenance does not disturb laboratory activities. To determine which type of ceiling system is appropriate, ask the following questions:
- What is the desired look of the corridor?
- What type of ceiling lighting is desired?
- What are the maintenance requirements of the ceiling?
- How often will the ceiling need to be accessed?
- Will there be significant height restrictions due to intensive ductwork?
Laboratory corridors are often quite long due to the modular layout of labs. Creating a ceiling system with some design complexity involving different types of materials will visually break down corridor lengths. Lighting can also de-emphasize the length. Varied lighting levels can assist in wayfinding by providing more light at major intersections or lab entrances and lower light where ambient light suffices. Corridor light selection can also influence which ceiling system to select. Light fixtures designed to bounce light off ceilings should be paired with a monolithic surface for even light distribution. To help an exposed ceiling choose fixtures that direct light away from the ceiling.
The amount of ceiling access required is determined in part by the layout of the HVAC ducts, piping and wiring. Some layouts have major access points above a main corridor, while others have access points above lab ceilings. If access points are above a main corridor, a flexible ceiling is best. The ceiling may still be composed of various materials, but the design should take into account how each material accommodates access.
Some ceiling systems allow for frequent access. Exposed structures are ideal for a heavily accessed HVAC system and when ceiling heights are limited. But it is difficult to control the installation of the ceiling elements for a tidy end product. If mechanical systems are exposed, acoustical liners should be used to minimize noise from air flowing through ductwork, and the pipes should be painted. With a sufficient number of air changes flowing through a space, little or no dust is likely to collect on the pipes.
More Than a Hallway
Corridors offer opportunities for people to see each other and exchange ideas. The most successful lab corridors have interior windows, provide places to sit, are well lit, include image-enhancing displays, and are finished in a variety of colors, patterns and materials.
Some corridors double as image-enhancing public tour routes, allowing guests to safely view labs without interrupting activities. Such routes are generally along the outside wall of the first floor, with views to some interior labs and the exterior campus, or at one end of the building on all floors. These routes often feature well-lit, educational displays about the organization or the type of research being conducted. In corridors that are less public, marker and tack boards can provide workers with another way to share information.
Door Details
Corridor doors should be a strong design element if a rhythm that integrate floor, wall and ceiling patterning is created during lab planning and schematic design. Lab doors, with a glazing inset where appropriate, should be recessed to prevent them from swinging into the path of a passerby, and the inevitable lab signage should be treated as a design element within the recess. Tack boards indicating location can serve as temporary or permanent signage.
The durability of lab doors is important because carts and equipment cause damage over time. One solution is to surface-apply stainless steel plates to the lower half of the door. Some newer door systems have an integral stainless steel-edge trim at the jamb as well as integrated, rather than applied, stainless steel plates on both sides of the bottom half of the door. Although they cost more, doors with the integral protection save money over time because those with applied protection are replaced more frequently.
Corner guards and guardrails are important in laboratory corridors because carts and equipment can damage wall edges and surfaces. Materials for corner guards and guardrails range from acrylic and plastic-molded to aluminum and stainless steel. The appropriate material is determined by the amount of abuse anticipated, the budget constraints and the design aesthetic.
When a guardrail does not protect a corridor, cementitious wallboard or high-impact wall panels may be applied to the wall from the base to 36-inches to 42–inches high. Manufactured in standard sheet sizes, these products are surface-applied and can be installed in a modular fashion to create an attractive design element. Another option is high impact-resistant gypsum wallboard, which can be installed in conjunction with standard (and less expensive) gypsum wallboard for a seamless installation.
Well-Placed Windows
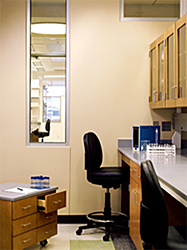
When possible, support labs should include windows looking into the large open labs and other adjacent spaces.
It is important that corridor windows allow natural daylight to flow deeply into the interior of the building. And no matter how windows are patterned along the corridor, they should correspond with circulation zones inside the labs. The heights and locations of windows should also coordinate with lab equipment. Lab benches with overhead shelving will conflict with lower windows. Thus, such shelving - whether it is placed initially or at a later date (which is often the case due to the flexibility of labs) - must be considered when placing interior windows. Clerestory windows are usually appropriate about 7 feet above equipment, as long as there are no overhead connections between the ceiling and the equipment.
Corridor Flooring and Finishes
Corridor flooring and finishes are typically the same in adjacent labs, but when they are different and there are variations in thicknesses of flooring between the corridors and labs, a transition is needed to minimize the impact of carts moving between the spaces. Almost any commercial wall finish may be used in corridors as long as repairs can easily be made, as walls are frequently damaged.
Corridor Seating and Displays
Seating areas, to accommodate conversation outside of labs, may be created adjacent to or at the end of a corridor. In most academic buildings, seating along the corridor provides a place for students to wait between classes. Thoughtful placement of pin-up strips/tack boards, whiteboards and display cabinets can add to the dynamic nature of corridors.
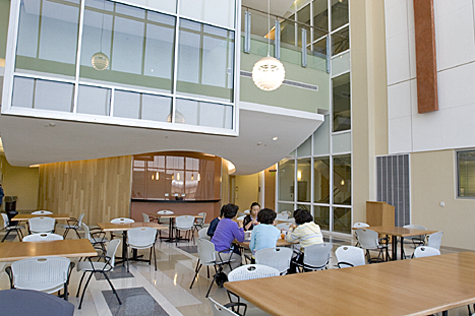
Comfortable spaces and seating outside the laboratory and office.
Office and Service Corridors
Like hallways, well-designed office corridors encourage communication, whereas interaction is lowered when departments do not share integrated space. Connectivity is important. Studies have shown that fewer than 5 percent of people will meaningfully communicate with each other once a week when their offices are more than 100 feet apart and segregated.
Service corridors typically house the lab engineering services. If the corridor is at least 10 feet wide, the opposing walls may store supplies, such as gas cylinders and even noisy equipment that otherwise might be in labs. Because service corridor equipment is noisy, generates heat and is unattractive, service corridors should not be near the main entry into the labs.
Elevator and Stairs
Elevators and stairs, along with main corridors, make up the public circulation system in a building, and as such, they should be highly visible and pleasant to use. Passenger elevators should be situated along main corridors for easy wayfinding. Most laboratory buildings need at least one passenger elevator (near the main entrance/reception area) and one freight elevator. It is a good idea to place an architectural stair near the passenger elevator in case it malfunctions and also to encourage the use of stairs. Many institutions now actually require that buildings have one set of centrally located fire stairs with upgraded materials to promote a healthier workforce through the use of the stairs. The freight elevator may either be adjacent to the passenger elevator(s) for cost and efficiency or, more typically, away from pedestrian traffic, such as near the loading dock. The latter can increase building security by tightly controlling building access. The freight elevator usually is controlled by a security access card and used only for transporting materials, supplies or equipment.
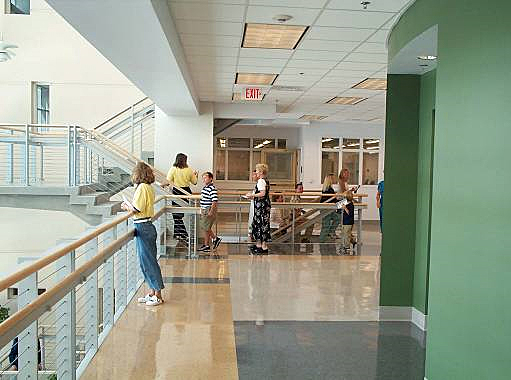
In the atrium of Florida Atlantic University's new research facility, the main stairs are near the elevator to encourage their use. The stairs also serve as a design feature and are highly visible to facilitate communication.
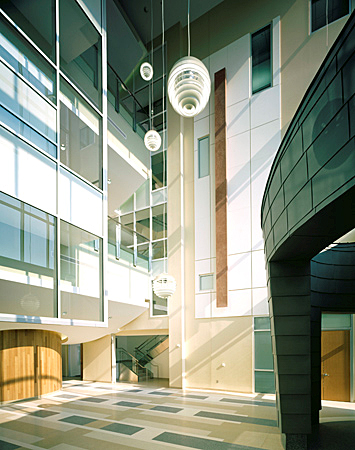
This fire stair, which doubles as an architectural stair, has a fire shutter on the first floor; glazing is on the remaining floors.
Fire stairs must be a set distance from each other, usually less than 300 feet if the building is fully equipped with sprinklers. The stairs should be highly visible for wayfinding and security, and should be located along the outside wall to allow for exterior windows and views. The lantern effect that the exterior glass creates makes for a safer building, especially at night, because people can see one another. Fire stairs should be wider than the minimum standards required by the building codes, allowing two people to comfortably use the stairs at the same time.
A utilitarian fire stair is often transformed into a stunning design feature through the use of wood, metal and tile upgrades; a window seat; natural daylight; and views to the exterior. If the stair also includes interior windows, which require fire shutters, it will be visible and inviting from the main corridor as well. Although fire shutters, which automatically drop from the ceiling to cover the window glass in case of fire, are an additional expense, they allow a fire stair to become a highly successful design element.
The flooring on a well-trodden stairwell must be extremely durable. A modest upgrade to a utilitarian stair may include rubber or treated concrete at the treads and/or risers. For better durability, and if a soft surface is desired, carpet is typical. Although a wool carpet is a significantly higher first expense than nylon carpet, it holds up better and lasts longer. Hard monolithic finishes, such as terrazzo and stone slabs, are ideal as they require very little maintenance over a long life span. Stair railings protect the wall, so wall finish durability is not a great concern. An upgraded stair often features special light fixtures, but they must be selected carefully to avoid a direct view of the lamp from above or below.
Research Labs
The quality and image of the research lab are of utmost importance to the end users. Key considerations are use of materials, type of casework, color scheme, natural lighting, interior glazing, light fixtures, equipment space and efficiency.
Casework must accommodate the specific needs of the current research team yet provide flexibility for future use. Determining the initial amount of casework, and the fixed-to-mobile ratio, is important. Some casework should allow for vertical adjustment. To ensure that money is well spent, the researchers should be given an opportunity to review the layout and specific design of each type of casework. As discussed in Chapter 6, mobile casework is popular in many labs today, reducing the need for fixed casework. A practical layout places modular casework in the center of the lab and fixed casework at the perimeter, allowing for maximum flexibility at the center while reserving the outside for utilities, which are unlikely to change.
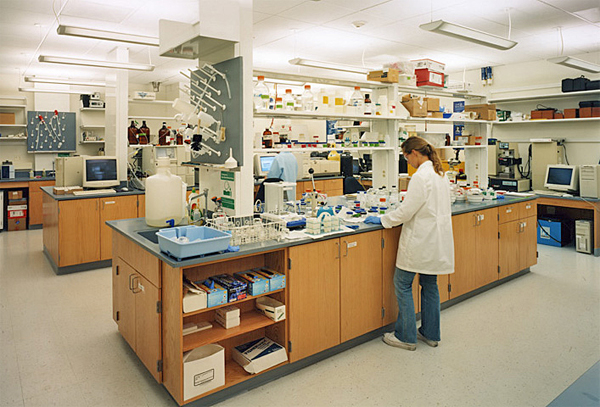
The choice of casework (metal, wood or plastic) and the color of casework finishes have a significant impact on the quality of the design.
Color, both in floor patterns and along the wall, is an inexpensive design element that can dramatically impact the visual image of each lab as well as the entire building. Floor patterning should take into account three zones: casework, circulation and equipment. The patterning should be modular, working off the lab bench modules. Ideally, the pattern should help define these zones while being visually flexible enough to look appealing in future lab reconfigurations. And, because any clear wall space without windows may eventually be covered with equipment, flexibility is needed in wall patterning as well.
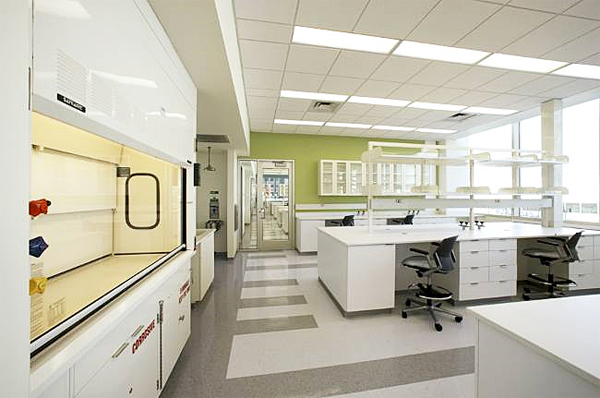
Lab colors and patterns should complement the design and finish of the building as a whole. Beyond simply being a matter of taste, color may affect how a person perceives his or her work.
All colors reflect onto the surrounding area, especially bright or highly intense colors. If an environment requires sensitivity to light or color accuracy, a neutral pallet may be best. Furthermore, high-contrast colors may cause eyestrain. Working with light material on a dark surface, for example, requires a person's eyes to constantly adjust, causing the eyes to tire over long periods of intensive work.
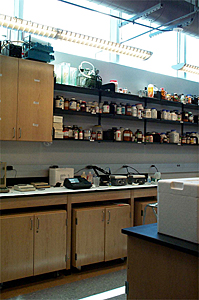
At Florida Atlantic University, the exterior windows are 7 feet above the floor, allowing storage along that wall.
Space for equipment should be coordinated with the placement of casework and with the design of the lab as a whole. Placing equipment along one wall or in separate rooms allows labs to be more open. And remember to place tall equipment with care as it may block views. It is critical to create efficient bench space, casework and storage space in each lab. The key purpose of lab modules is efficiency; they create optimum space for research and circulation. State-of-the-art labs take advantage of the volume of space. Shelving and cabinets above benches must be fully coordinated to maximize storage space. In locating storage high above benches, take sprinkler requirements into account. Also, be aware that, in lieu of windows, many researchers would rather have additional wall space for equipment and storage to use the full volume of space in their labs.
The color and finish of casework, as well as the choice of material (metal, wood, plastic, or a combination of wood and metal), is an important part of the visual setting. The casework and countertop should complement the walls, floor and ceiling. Chemical-resistant tops and stainless steel counters can present crisp images that are visually pleasing.
The integration of functional yet attractive lab accessories, such as tack boards and whiteboards, can support teamwork. As individual research methodology gives way to the research team approach, design elements that support collaboration within the lab environment become more important.
Whenever possible, allowing natural daylight into the labs improves the image and quality of each space. If there are panoramic views to the exterior, designers should take full advantage of them by locating appropriate labs and offices along the outside walls. The use of sloping lay-in ceilings may dramatically increase the distribution of natural daylight and the quality of the work environment. Interior windows allow people to see each other, and the light filtered through the building creates a more pleasant work environment. The design and location of light fixtures may add to the overall quality of the space so long as glare is controlled, the brightness-contrast ratios are high and color rendition is accurate.
As with corridors, most labs have either a lay-in or exposed ceiling system. A challenge arises when trying to allow for flexibility for future reconfigurations while integrating into the ceiling system services such as lighting, overhead service carriers and chilled water beams. A lab built on a series of modules such as a column grid, casework-to-circulation/equipment or an overhead services system should have the ceiling systems based on the same modules. Where the ceiling modules occur in a lay-in ceiling, a change in the ceiling material may be helpful in accommodating future reconfiguration with minimum impact on the overall ceiling system.
Acoustical problems, mostly due to loud mechanical supply and exhaust ducts or equipment, are fairly common in labs. Hard surfaces in the room also bounce noise around. Noisy ductwork is usually the result of too much air being moved through the ducts or the lack of sound attenuators. If the equipment is loud, consider locating it in a separate room.
Offices
Researchers spend about half of their time in the lab and half in their offices, which can become cluttered quickly. Designing a visually successful office involves addressing several elements, including the quality and quantity of furniture; comfortable meeting space, the number of windows; the amount of shelving and other storage space; and functional requirements, such as computer work.
Private offices should have inboard orientation allow for an egalitarian distribution of the daylight and views to the exterior. By locating offices away from the window wall, generally ringing the core of the building, the heating and cooling of the overall space is more consistent. Furthermore, orienting a circulation path along the window wall encourages teaming by providing informal meeting spaces at the window.
Open office environments (cubicles) should be based on a module so they can be reconfigured easily. The lighting should be direct/indirect to reduce eyestrain and glare at computer monitors. A critical yet often overlooked element of open offices is general storage and filing space. This is a fundamental part of the programming process; if it is disregarded, the difficult choice of storage versus workspace will have to be addressed later in the project.
Interior Finishes
Floors
Floor finishes for labs are based on lab functions. To find the most appropriate, compare them for durability, chemical resistance, cost, maintenance, and aesthetics. In extremely clean or wet areas, troweled flooring is used because it does not contain adhesives, which can fail due to moisture. If bacterial growth must be prevented, use flooring that can be heat-welded into a seamless application with a cove base. Less stringent requirements allow for seamed tile flooring.
Tiles, which come in many shapes and sizes, offer the widest opportunity for design, color and patterning. As with modular planning for lab casework, tile flooring design should involve standard material sizes. Patterning should be a fractional derivative of the whole tile unit to reduce waste and labor costs. Some tiles can be heat-welded, making them an appropriate design solution when seamless flooring is required.
Maintenance may be a key factor in flooring selection. In labs where sensitive equipment is calibrated to detect particulates in the air, flooring suited to damp mopping is preferable to flooring suited to stripping and waxing. These cleaning processes create air-quality disturbances, which may cause erroneous equipment readings.
Static electricity can also affect some equipment. Some flooring materials can be grounded through their adhesive and the material itself to minimize the effects of static electricity.
Heavy equipment, especially when mobile, can wear on flooring. Materials with a higher pounds-per-square-inch rating stand up better to the long-term weight of equipment. Specific adhesives are available for some flooring to lessen the effect of rolling items and to increase the PSI.
Rapidly renewable and sustainable materials such as cork, linoleum and bamboo are now widely available and should act as a starting point for the investigation and creative application of environmentally friendly materials. Using materials such as recycled glass as an aggregate in terrazzo offers not only a unique aesthetic, but also helps create a greater demand for recycled and sustainable building materials. Wherever appropriate, sustainable materials should be considered for projects as part of a larger concentrated effort on sustainable design.
The following are advantages and disadvantages of various flooring types:
Concrete: Concrete is a very durable, relatively inexpensive floor finish and reasonably easy to clean. Disadvantages include poor chemical resistance; vulnerability to harsh chemicals; lack of comfort for standing and walking due to lack of resilience; and inconsistency in appearance over large areas. Concrete can be sealed, stained or tinted, depending on the desired aesthetic. Stained concrete is slightly more expensive than sealed concrete. Exposed concrete, whether it is sealed, stained or tinted, also costs more because the quality finish requires a higher quality concrete. Using vinyl composition tile (VCT) as a cost baseline, basic finished stained concrete will tend to be slightly less expensive than VCT.
Resilient tile (vinyl composition tile): Vinyl composition tile is cost-effective, durable, reasonably easy to clean, easy to replace, offers a wide range of colors and patterns, and is somewhat comfortable to walk on. Its disadvantages include the following: it has only fair resistance to chemicals, it has many joints where bacteria can collect, it has a low PSI, it has the highest life-cycle maintenance cost of all materials compared, and it is not an environmentally sensitive solution.
Resilient sheet vinyl: This flooring is durable, easy to clean, comfortable to walk on, may be turned up for a seamless cove base, and it prevents bacterial growth when heat-welded. Its chemical resistance is good and there are fewer joints than with tile flooring. Its chief disadvantages are high material cost (2.5 times that of resilient tile), high labor cost for extensive patterning, a low PSI and it is difficult to repair.
Solid vinyl tile: Solid vinyl tile is probably the most flexible flooring option. In addition to a wide range of colors, sizes and patterns available, it can be grounded, has a high PSI, has good chemical resistance, can be heat-welded with a cove base and only needs a damp mop for cleaning. The main disadvantages are that vinyl is not an environmentally sustainable material and the cost is approximately 2.5 times higher than the baseline cost of VCT.
Rubber: The advantages and disadvantages of rubber are similar to solid vinyl tile. A key difference is that, in addition to being available in tiles, it is also sold as a rolled product, which minimizes seams. Some rubber products can withstand the harsh usage usually reserved for troweled flooring.
Linoleum: Linoleum, available in sheets or tiles, is one of the best design options available. An all-natural product, it is respectful of the environment, requires little maintenance, is easily cleaned and repaired, and is time-tested in European installations. Where it excels in design options, however, it falls short in chemical resistance. With a moderate PSI and sensitivity to heavy moisture, linoleum should be reserved for applications similar to that of VCT. It is similar in cost to sheet vinyl, but the life-cycle costs are much lower because it does not require stripping and waxing.
Troweled epoxy: Troweled epoxy provides excellent resistance against chemicals and it is durable and easy to clean. Disadvantages include cost (more than four times the cost of resilient tile and 2.5 times more than sheet vinyl), limited color options, and difficulty of repair.
Carpet: Carpeting is an excellent floor finish for offices, large lecture halls, and common areas, but it is inappropriate for wet laboratories because of chemical spills and potential bacterial growth. Carpet tiles are a preferable to broadloom in areas where long-term or heavy use will require frequent carpet replacement. Carpet tiles also can create less waste, are widely available with recycled content, and may be recycled.
Ceilings
Ceilings either have a lay-in tile system or are open to the structure and mechanical systems. Ceiling tiles must be suited to the lab function. In open labs with a lay-in ceiling, the type of ceiling tile is not restricted. Where a cleaner environment is needed, cleanroom tiles with a scrubbable face may be required. In BSL-4 labs, a gypsum wallboard ceiling with an epoxy finish is recommended for areas that are frequently wet.
Ceiling tiles come is a variety of sizes. Of the most common sizes, 2' x 2' is generally preferred over 2' x 4' because the smaller size resists sagging and provides a smaller ceiling element.
Many labs work on a 10'8" module that is reflective of both a structural and working lab bench module. This allows for maximum flexibility in future reconfigurations. The ceiling utilities correspond to the 10'8" module; as a result, every 10 feet there are 8 inches of another material to accommodate utilities. In traditional lab design, the 8-inch-span was made of gypsum wallboard. However with a wide variety of metal ceiling tiles and panels now available, metal tiles are preferred. As changes occur, the tiles can easily be replaced, whereas gypsum wallboard must be patched, mudded, sanded and painted. Also the metal tiles can sit in the same type of ceiling grid as the other ceiling tiles, thus creating a more uniform appearance and avoiding the fussy transitions that often accompany a gypsum wallboard solution. Metal tiles are widely available in custom widths and lengths, some up to 10 feet. The longer length prevents small pieces from being cut and appears monolithic while still using a standard ceiling grid.
Walls
Lab walls are typically constructed of gypsum wallboard and are usually painted. In BSL-2 and sometimes BSL-3 labs, the paint is generally an eggshell finish. Clean areas in BLS-3 and BSL-4 labs require an epoxy finish.
Acoustics
For ease of maintenance, finishes for lab floors and walls are typically hard, and little can be done to mitigate noise. Insulation in walls and above the ceiling will reduce noise transmitted from one room to another. Acoustical design options for ceilings are limited because ceiling surfaces must be fully cleanable. A ceiling can be constructed of acoustical tile or perforated acoustical metal tile. If there is no lay-in ceiling and the piping and structure are exposed, acoustical baffles can be added. However, two significant problems with acoustical baffles—additional cost and a surface that can be easily contaminated—may make an exposed ceiling less desirable.
Wayfinding
Although critical to safety, smart wayfinding also serves to create a lively, interactive research community. Far beyond signage, successful wayfinding depends on the information inherent in a building's design.
Wayfinding begins with a welcoming entrance. It should help define a building's function and orient people quickly. An atrium, or volume space, near the entry is especially beneficial for an academic research facility as well as for many private and federal institutions.
Amenities such as conference/meeting rooms, restrooms, stairs and elevators activate such volume spaces, as do mailrooms, lounges and eating establishments. Visually engaging labs overlooking the atrium can create added interest. Virtual screens that allow people to see what is happening throughout the building are also becoming popular.
The main circulation is the next key wayfinding issue to consider. A single-corridor design operates like Main Street, with everyone coming and going along the same path. A double corridor provides more direct access to laboratory spaces and offices, but tends to separate people and can be confusing. Examples of both concepts follow:
At JABSOM Phase II in Honolulu, Hawaii, a single corridor clearly leads to all program spaces to the north or south. The corridor widens to the west with informal seating, a view and an egress to the exterior. The east corridor is secure, and lab entry alcoves are recessed for safety and to provide space for equipment to swing through the doors from the corridor. An exterior view in the east corridor provides orientation and helps define an egress to the exterior space and an adjacent building.
The upper floor of Genencor International Technology Center in Palo Alto, Calif., features a very small corridor off the elevator with office suites to the east and west and open labs to the north and south.
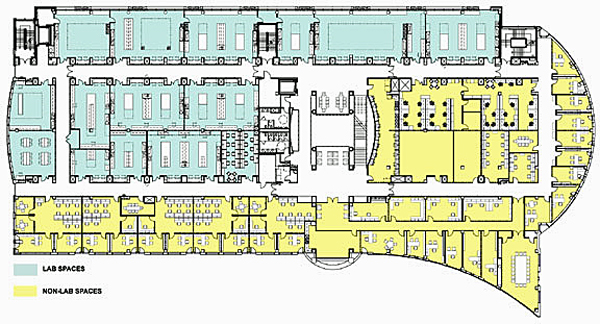
A "racetrack" corridor is best suited for extra-deep spaces with program space in the middle. The double-corridor setup, however, can split the population and impede wayfinding. Here, a central atrium surrounded by common amenities and exterior views at the end of the corridor support good wayfinding.
NASA's Cape Canaveral, Fla., research building organizes all wayfinding around a clear entry from the west leading into an atrium overlooked by circulation areas on the upper floors. On each corridor, one wall is along the exterior for natural light and excellent views; the other wall provides access into the labs. The end of each corridor leads to fire stairs open to the exterior.
Additional Resources
Federal Agencies
- Department of Energy (DOE), Office of Science—For examples of facilities to support instruments of science, see DOE's Brookhaven National Laboratory
- Department of Energy (DOE), Environment, Health, Safety & Security
- Department of Veterans Affairs (VA), Office of Construction & Facilities Management (CFM)—VA Research Laboratory Design Guide
- Environmental Protection Agency (EPA), Office of Administration and Resources Management (OARM)
- General Services Administration (GSA), Office of Chief Architect (OCA)
- National Aeronautics and Space Administration (NASA), Facilities and Real Estate Division (FRED)
- National Institutes of Health (NIH)—Office of Research Facilities Development and Operations (ORF) developed the NIH Design Policy and Guidelines to provide standards to assist planners, architects, and engineers in designing biomedical and animal research facilities for the NIH.
Organizations/Associations
- Laboratories for the 21st Century (Labs21)—Sponsored by the U.S. Environmental Protection Agency and the U.S. Department of Energy, Labs21 is a voluntary program dedicated to improving the environmental performance of U.S. laboratories.
- A Design Guide for Energy-Efficient Research Laboratories—A reference that helps facility owners, managers, and designers apply energy-efficiency features in laboratories.
- Environmental Performance Criteria (EPC)—The Labs21 Environmental Performance Criteria is a rating system specifically designed for laboratory facilities. It builds on the U.S. Green Building Council's LEED® Green Building Rating System.
- Labs21 Design Process Manual—Includes a "quick reference" sustainable strategies checklist as well as links to key resources for each stage of the design process.
- Labs21 Tool Kit
- Labs21 Annual Conference presentations
- U.S. Green Building Council, LEED® Application Guide for Laboratory Facilities (LEED-AGL)—Because research facilities present a unique challenge for energy efficiency and sustainable design, the USGBC formed the LEED-AGL Committee to develop a guide that helps project teams apply LEED credits in the design and construction of laboratory facilities.
Publications
- ASHRAE 110 Method of Testing Performance of Laboratory Fume Hoods
- ASHRAE Handbook - HVAC Applications, Chapter 16 Laboratories
- ASHRAE Laboratory Design Guide
- Biosafety in Microbiological and Biomedical Laboratories, 5th Edition by U.S. Department of Health and Human Services, Centers for Disease Control and Prevention and National Institutes of Health. Washington, DC: U.S. Government Printing Office, May 2009.
- Building Type Basics for Research Laboratories, 2nd Edition by Daniel Watch. New York: John Wiley & Sons, Inc., 2002. ISBN: 978-0-471-21757-2.
- Guidelines for Planning and Design of Biomedical Research Laboratory Facilities by The American Institute of Architects, Center for Advanced Technology Facilities Design. Washington, D.C.: The American Institute of Architects, 1999.
- R&D Magazine—Provides information on a variety of topics related to laboratories. The R&D Lab of the Year award is presented annually to outstanding laboratory facilities throughout the United States.


